Follow Along
You can read about our adventures here.
Visit our Youtube page to follow along by video.
Visit our Youtube page to follow along by video.
|
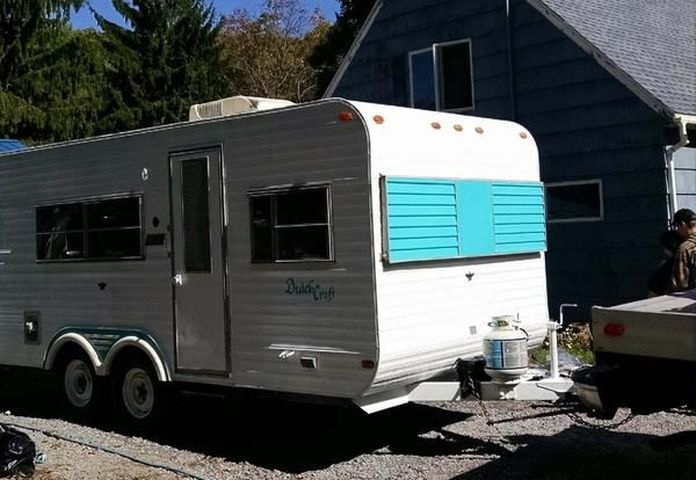
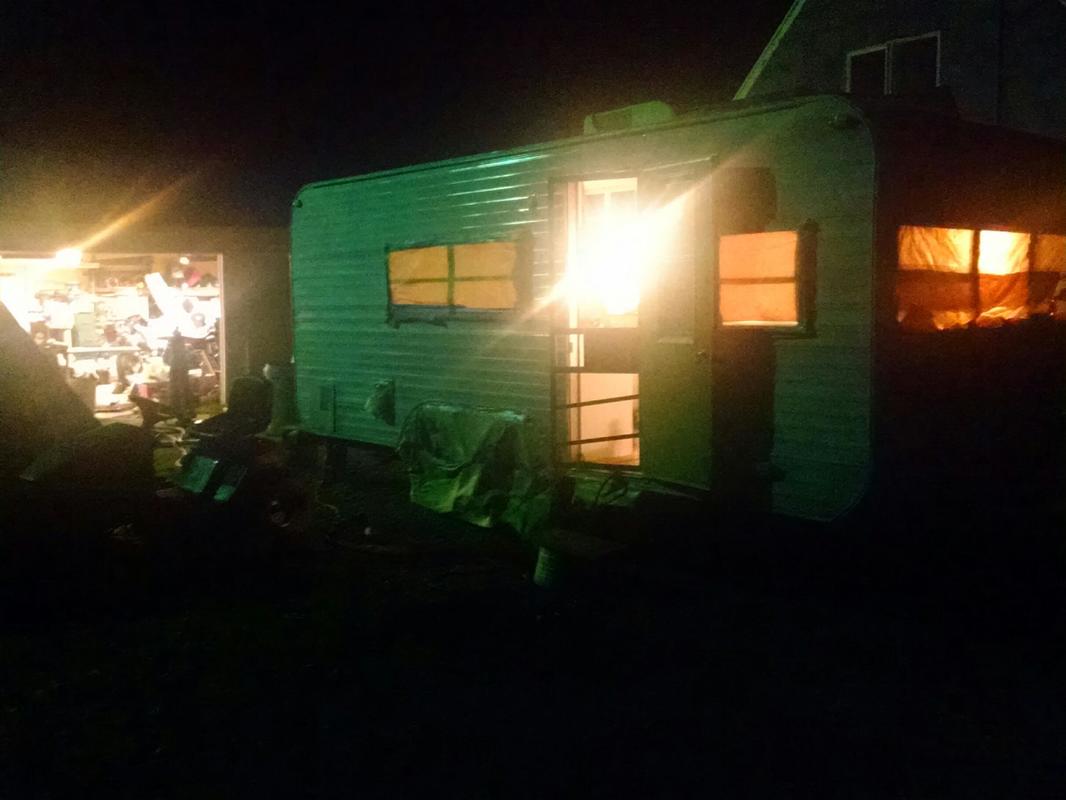
It’s been a long time coming, but we wanted to share the story of how we turned an old family camper into our full-time home. The “make this trip happen” process started with figuring out how we would travel. We weighed a lot of different options – RV/trailer/van/lease/buy/hitchhike. I could probably (and still might) write an entire post just on making that decision. In the end, the “free” option won, and we decided to take on renovating the 1976 Dutch Craft camper parked in Sam’s parents’ driveway. In case you are in a hurry, here’s the short version: we did not know what we were getting ourselves into. All in all, the project took about a year of weekends and any spare free time. I won’t say that we completed the renovation in a year, because it is absolutely an ongoing process. There is always something to be fixed, but now it feels like we are repairing our home. Here’s how we got to that point:
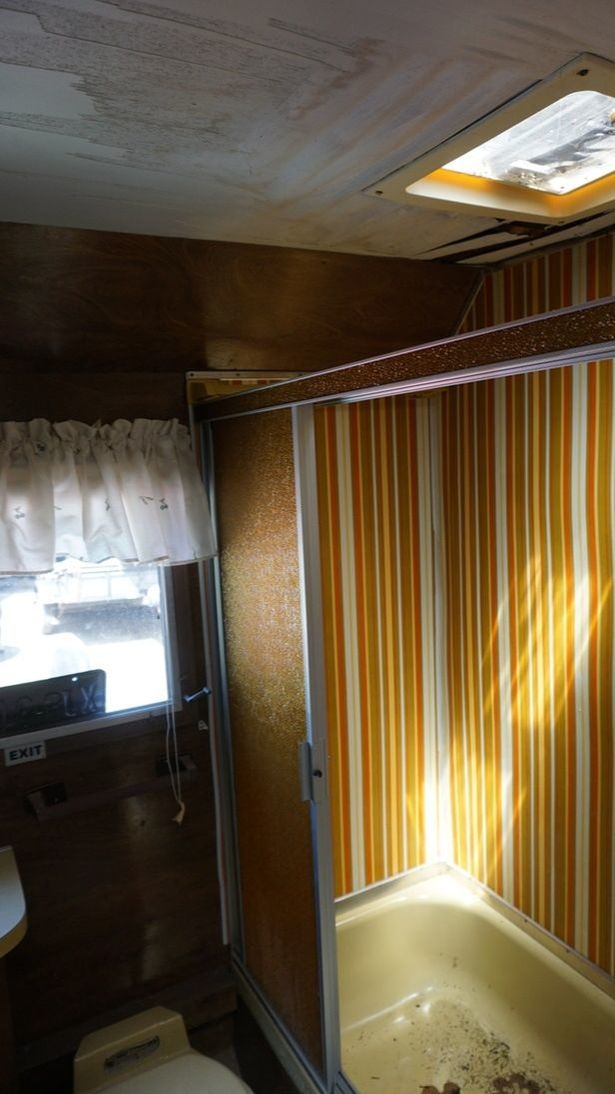
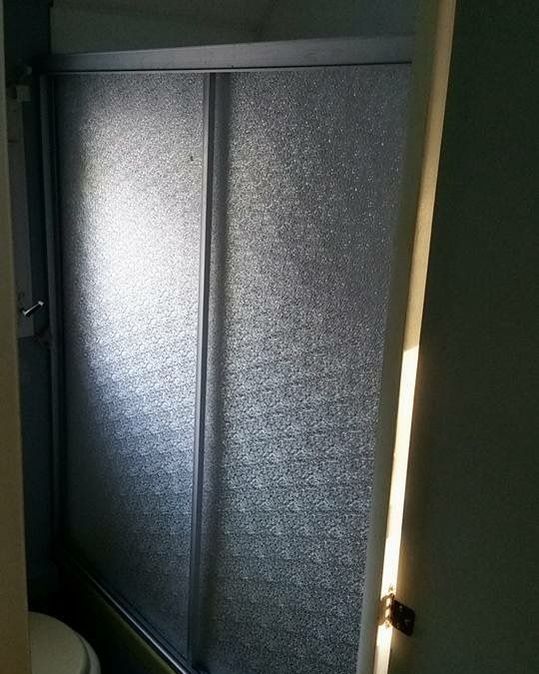
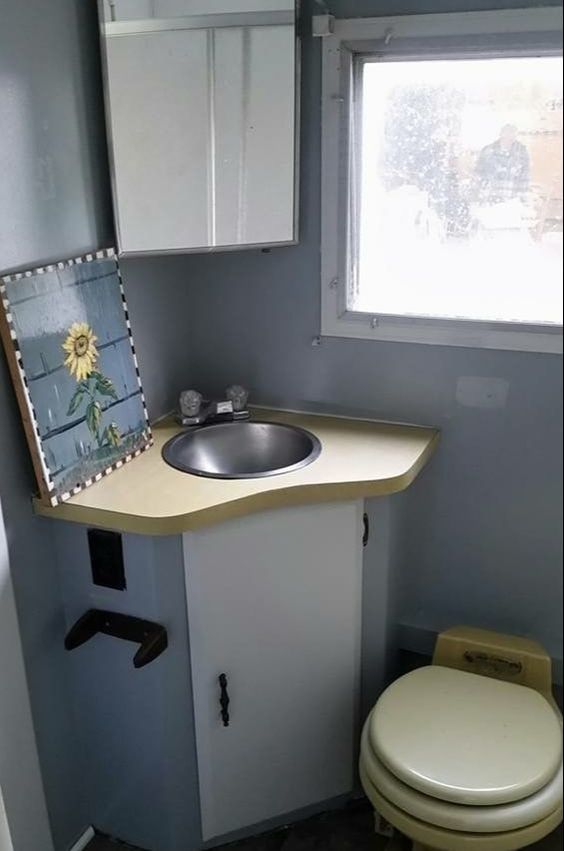
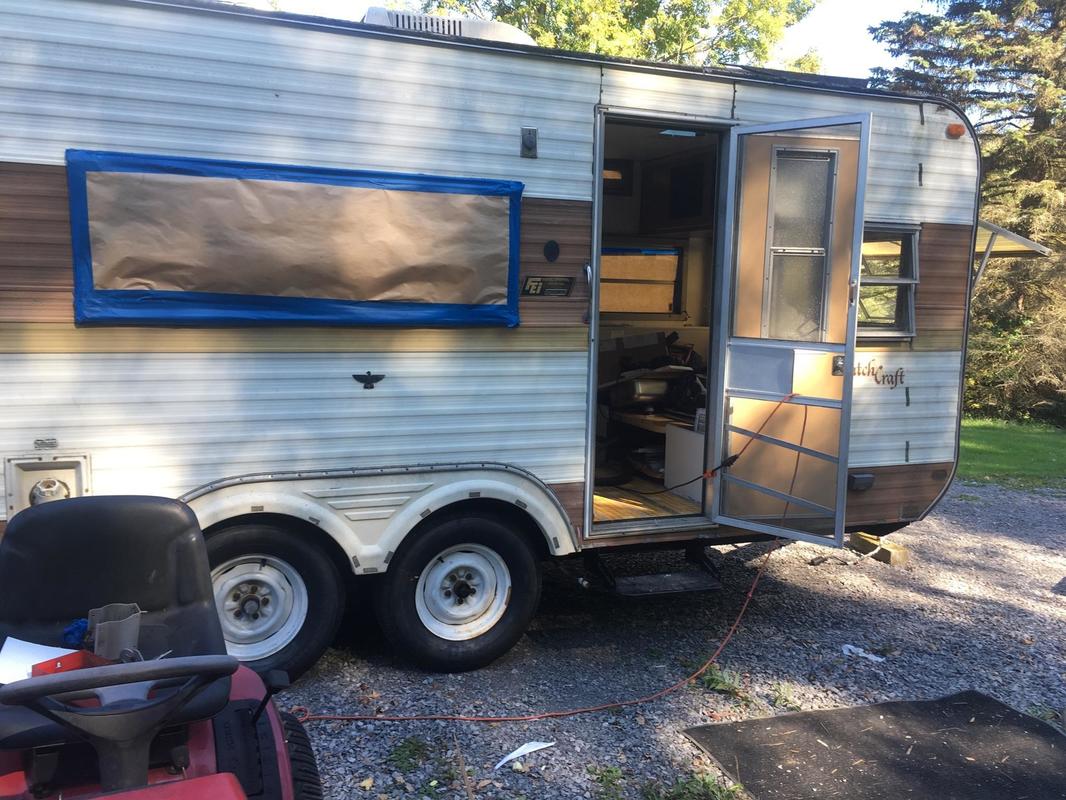
Step One - DemolitionThis was the family favorite of the renovation stages. The first step was to take every removable item out of the camper. The next step was to take every non-removable item out by force. Much of what came out did not make it back in. We temporarily removed all the doors (all two), cabinet doors, cushions, air conditioner cover, and exhaust hood. The table, counter top, shower doors, part of the bench seat, carpet, a couple walls and most of the ceiling came out too. There was never a point where the camper was totally emptied out. If you are easily overwhelmed, beware; there will be stuff everywhere. It’s part of the process and it will be okay. You can relieve the tension by ripping the awning down. 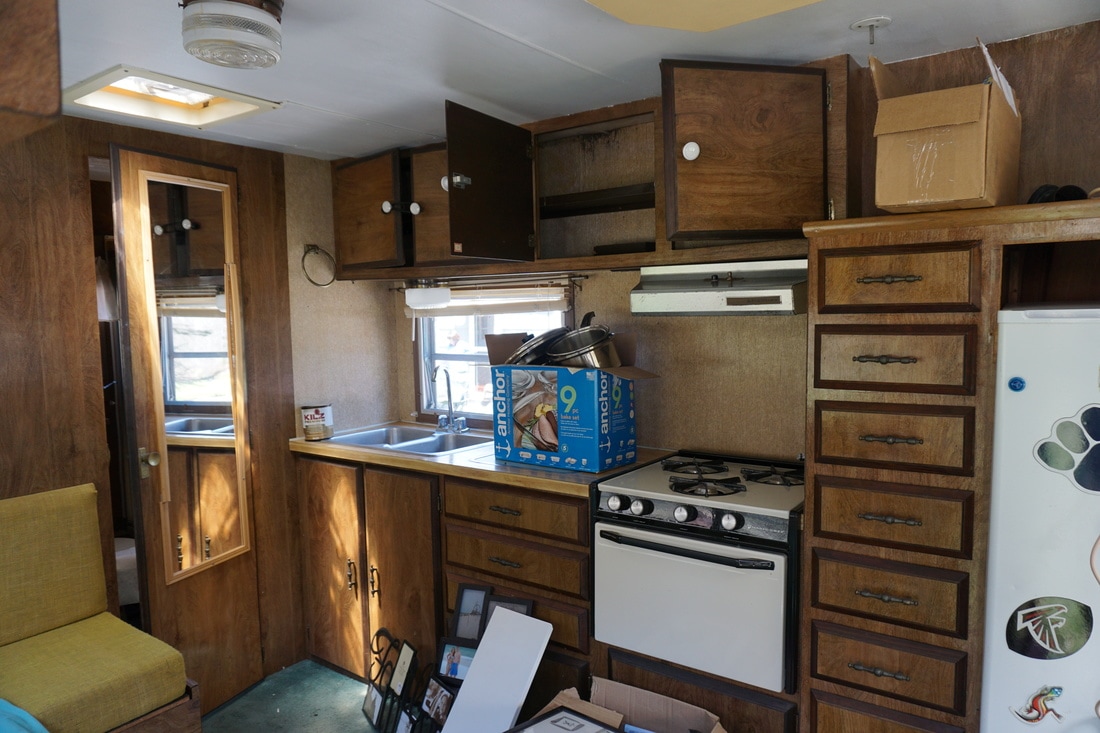 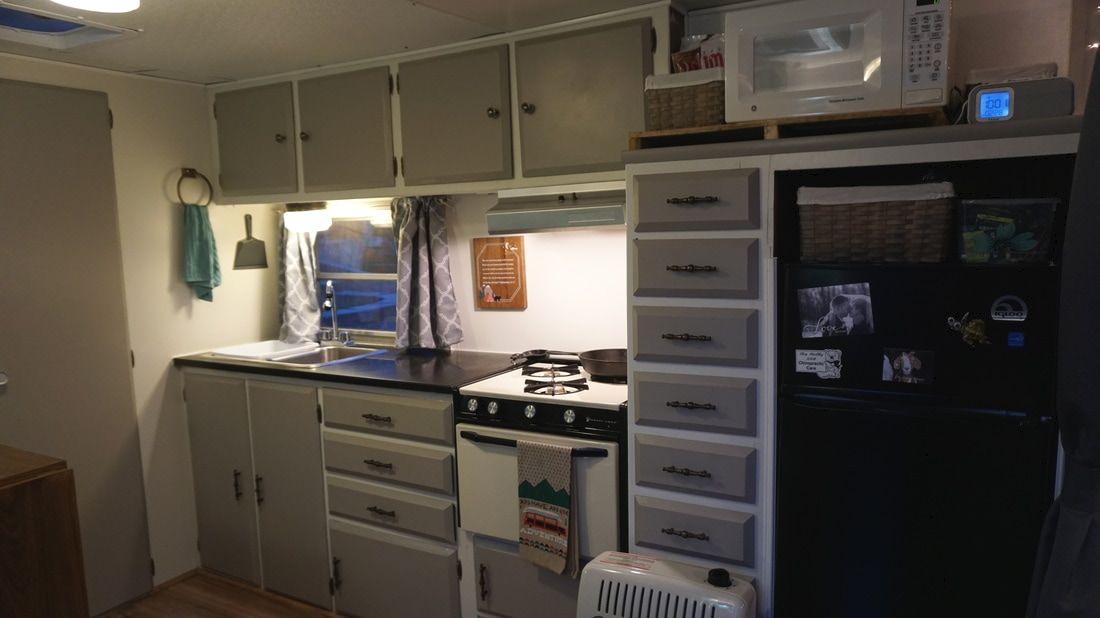 Step Two - Fix EverythingcThis step can also be referred to as “make daily trips to Home Depot.” We got very lucky with our antique because most of the important things – like the trailer frame – are in pretty good shape. Beyond that, we had work to do. There was extensive water damage because of leaky vents. Turns out, water causes a lot of problems. To avoid this in the future, we installed new vents and resealed the roof. We had to replace parts of the camper frame, most of the insulation, the bathroom walls, and the ceiling. The foamboard insulation was much nicer to put in than the old cotton candy was to pull out. However, if you buy it too thick, you’ll have to do some creative shaving down to get the ceiling up. We used fiberglass reinforced plastic (pebbleboard) to replace the walls and ceilings, but learned the hard way that a staple gun will not puncture the harder version of FRP. Go for a nail gun (or screws if you have to) after a healthy coat of liquid nails. Some of the plumbing was old and cracked, especially on the black and gray tanks. Sam’s brother Jeremiah put in new waste valves and new PVC. We had to replace and rewire broken tail lights; it took a whole team of friends, but we now have fancy and functioning LEDs. To replace the old counter, we found a piece of lab table from a university at a salvage store that works perfectly and doesn’t require use of hot pads – win-win. In the process of fixing everything else wrong with the bathroom, we managed to destroy the shower doors. We fashioned a new set out of industrial fluorescent light covers from Home Depot. At this point, we were starting to get good at making stuff up.
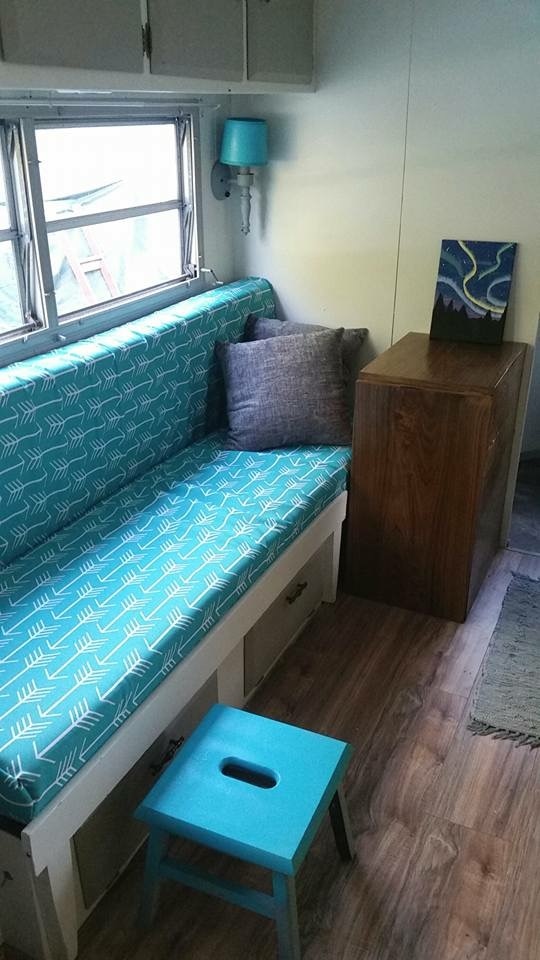
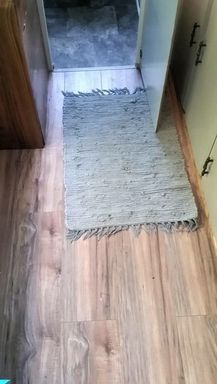
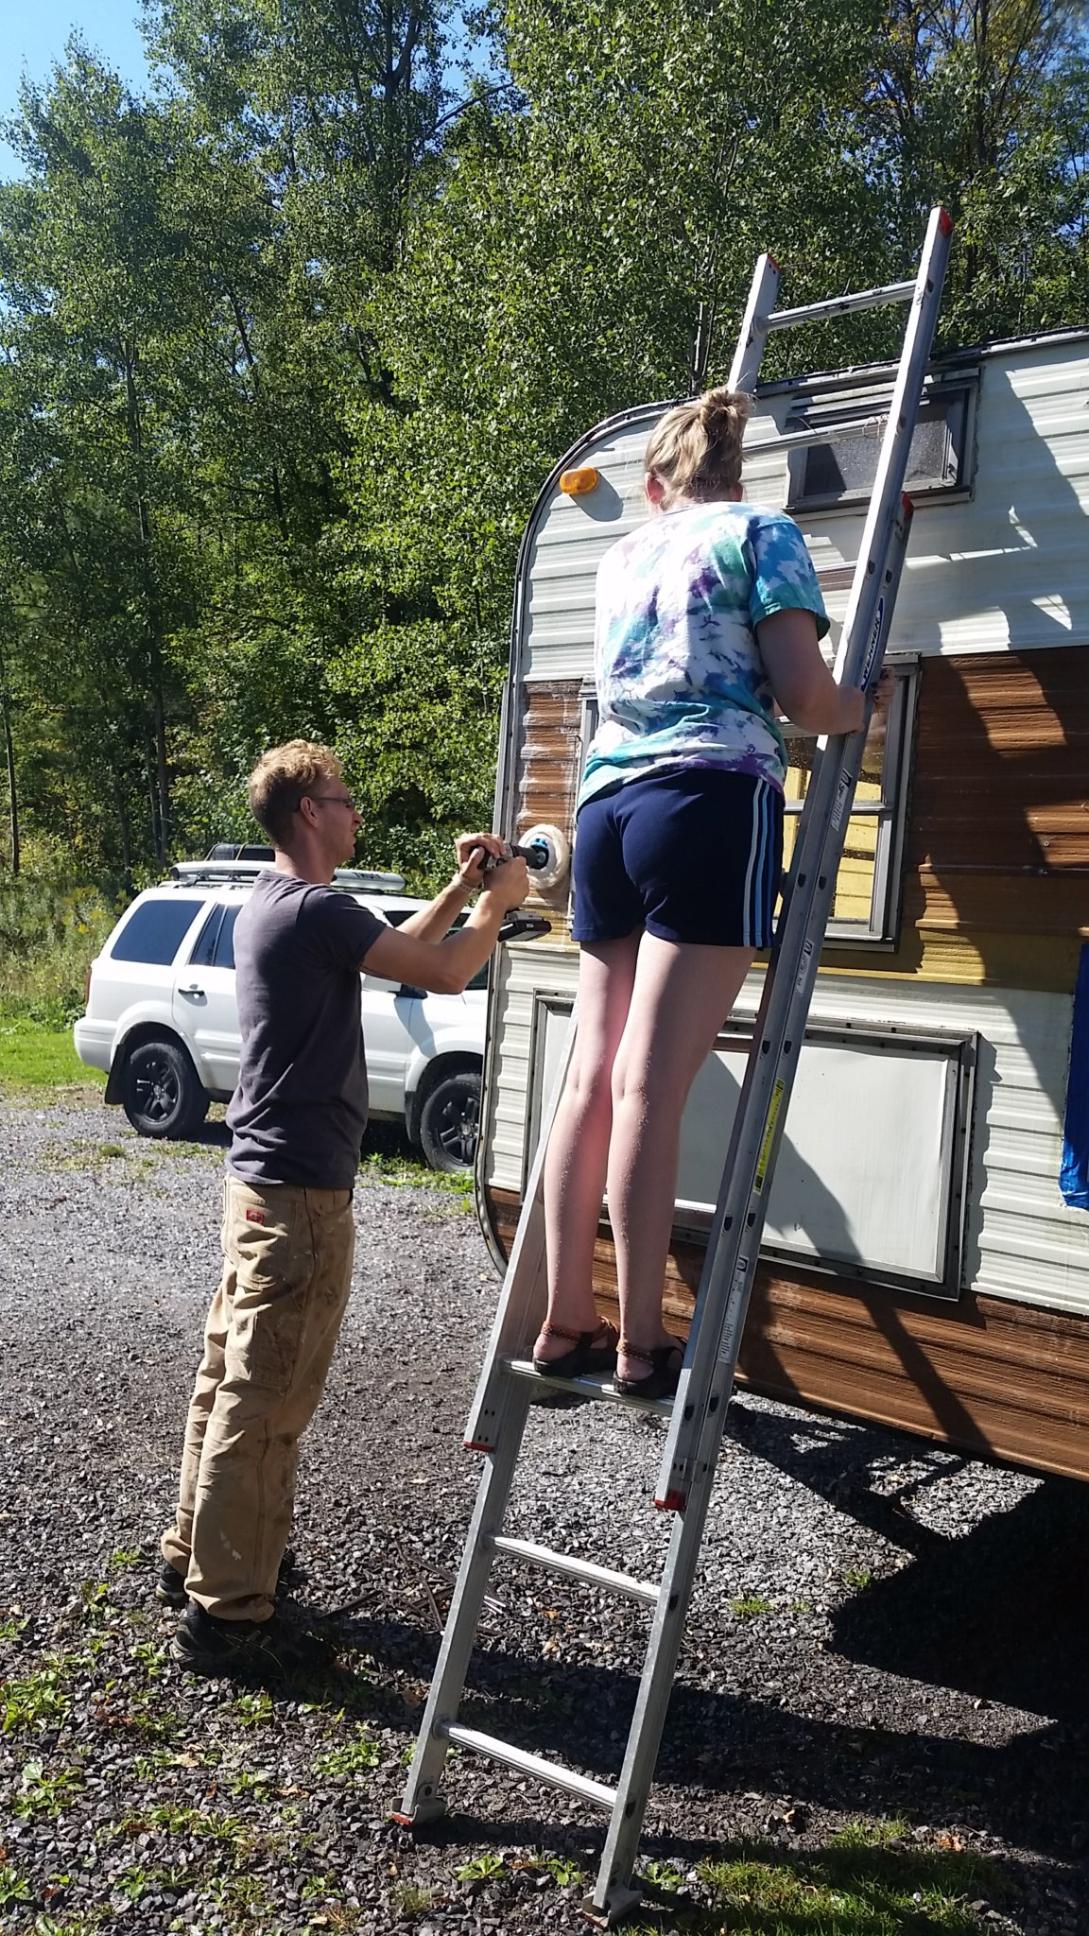
Step Three - PAINTThat’s all. Just paint, for days. When you think you are done, paint more. Also, wood paneling will not die without a fight, so you’ll need to sand the crap out of everything. When you are finished painting – no, just kidding, you’ll never be done. 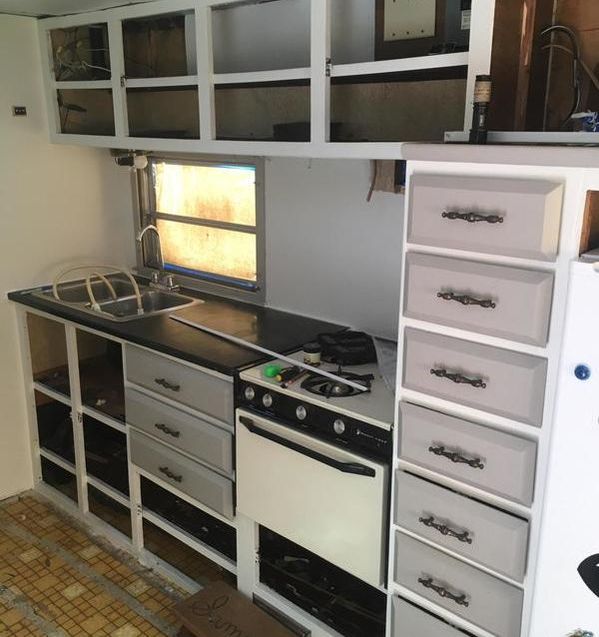 Step Four - Make It Your OwnA huge part of our decision to go with the Dutch Craft was the opportunity to make it a space of our own. We had so much fun transforming the dark, weathered interior into a bright and modern space. We tried to salvage what was already there whenever possible by cleaning/polishing/painting, but we did add several fresh touches. Some of our issues with the original space were the disintegrating yellow cushion covers, green carpet, too-big table, lack of storage, and the “wood look” everything. It was a feat just to cover all the brown. We definitely needed more paint than we expected – always go for the gallon – but it was worth it. It truly transformed the space. The gray and white color scheme paired with turquoise fabric feels beachy and calm – we absolutely love it. A quick polish saved most of the cabinet hardware, and we replaced the old knobs at a discount hardware store. All the other metal got a couple coats of metallic spray paint and looked good as new. 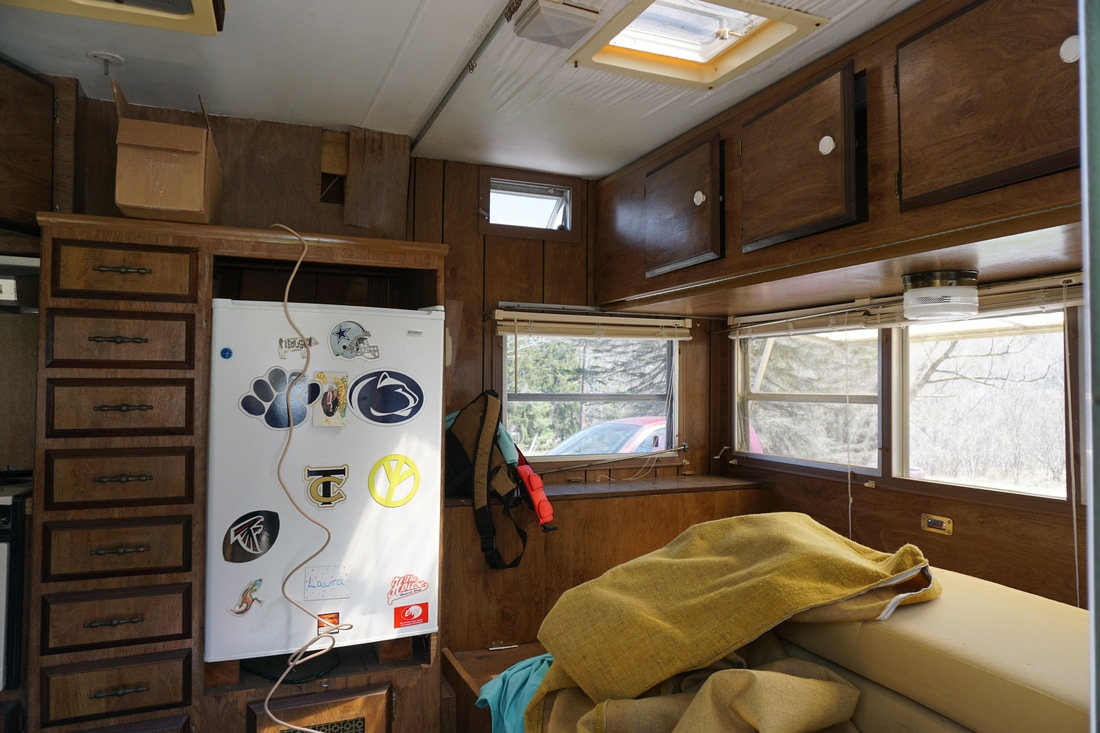  We thought it would be simple to replace the dingy window blinds with cheap curtains. We learned that buying curtains in general is frustrating, and buying curtains online for a camper compounds the issue. After three tries (thank you Amazon for free returns) we found tiered curtain pairs in a pattern we don’t completely hate. It is also important to find the double-lined variety if you care about your neighbors seeing you naked. The booth/bed convertible space serves as our “bedroom.” A Walmart curtain rod, two long tie-back pairs, and a set of old Christmas lights were a simple solution. The space above the bed is technically a lofted bed, but we tossed the extra cushions and added fabric storage cubes to create storage for our clothes. That was an easy fix; paring our clothes down to three cubes each took a little more effort. 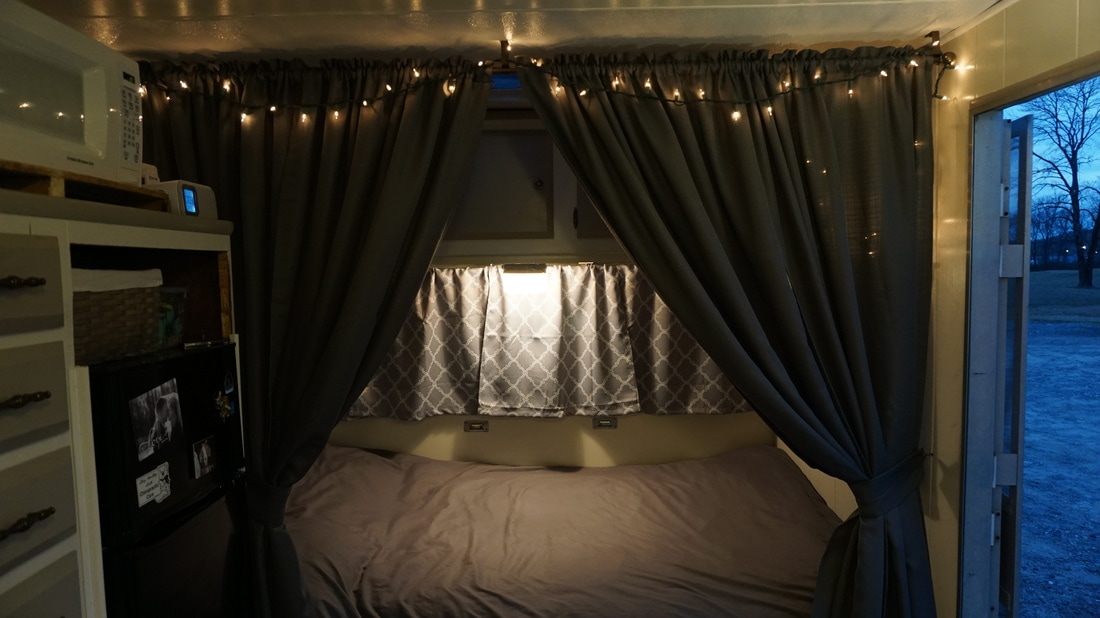 Two sweet friends came through for us to solve the cushion and table complications. We found patio furniture fabric online and Kathy sewed us gorgeous new covers using the old ones as a pattern. The idea for a storage cabinet that converts into a table was not too much for Shane, and he created exactly the functional piece we pictured. We are not always good at asking for help, but I’m so glad we did. Lord knows what it would have looked like if I tried to sew those cushion covers… The final addition of laminate wood flooring brought everything together so well; it finally looked the way we pictured. It was a relatively cheap Home Depot find (we might as well be sponsored by them at this point) and has matching molding. Laminate is an amazing option for RVs because it looks great but takes a serious beating. It’s also easy to install, and easy is very, very good. 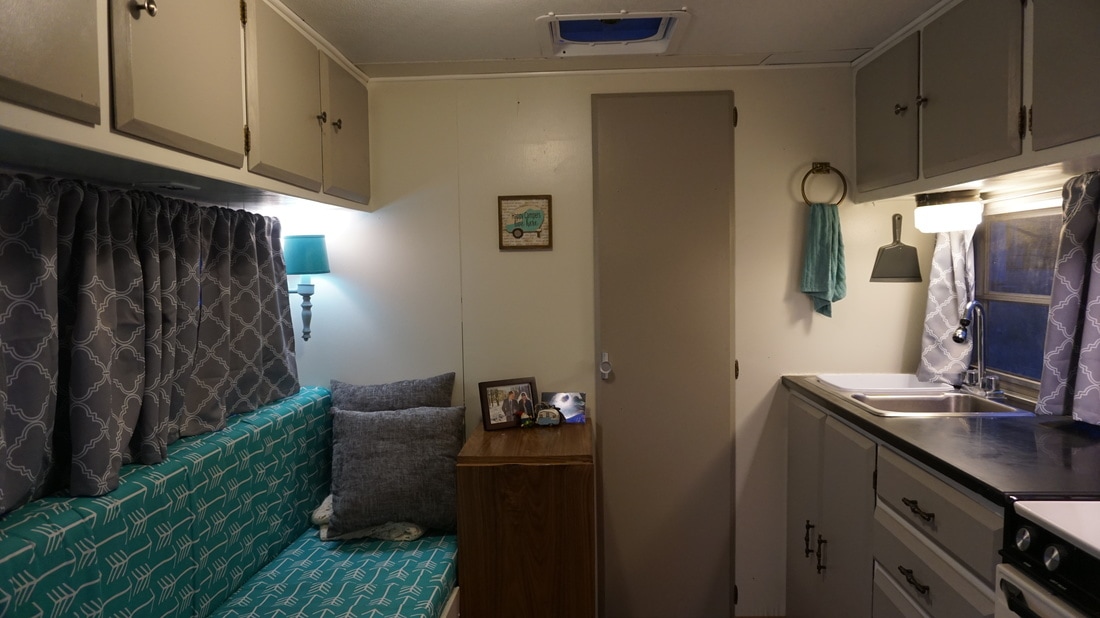
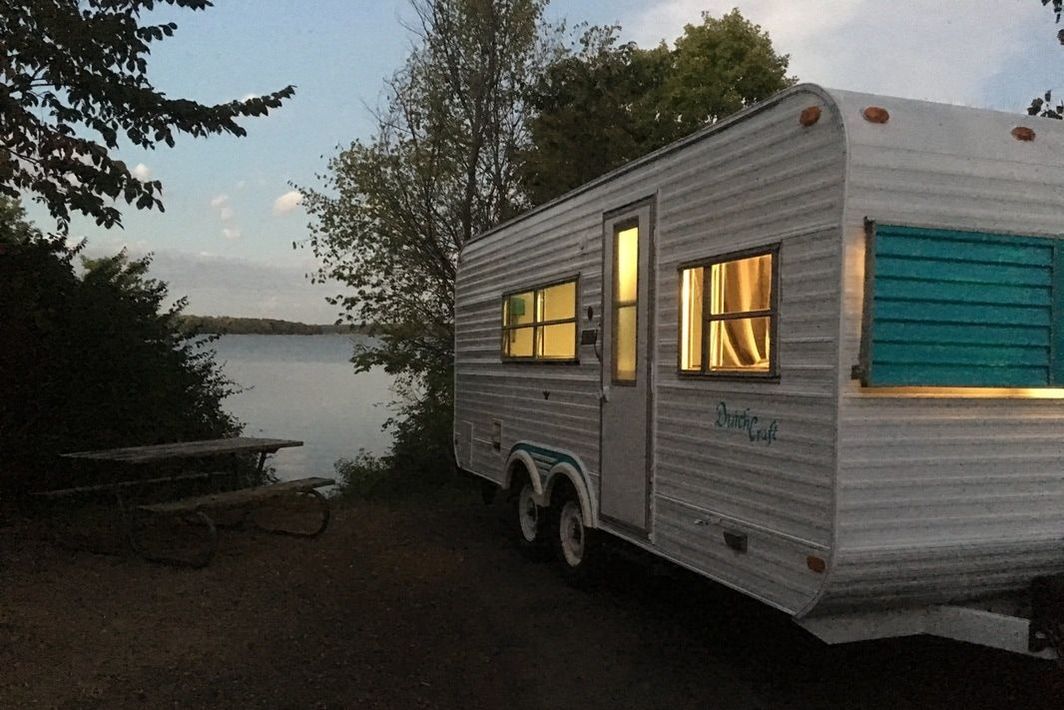
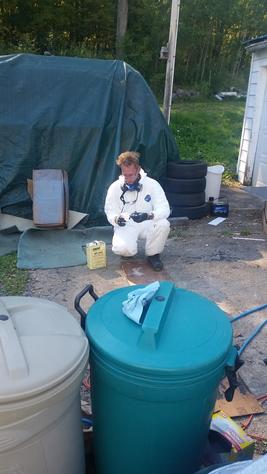
Step Five - Paint AgainMost people choose to maintain the color scheme of their vintage campers with a good clean and polish, but we were determined to bring the modern theme of the interior to the outside. Sam got a creepy paint suit and mask and we bought PPG alkyd enamel paint in plain white. Originally, we intended to do the classic color panel in turquoise as well, but the way this next bit went… it just didn’t work out.
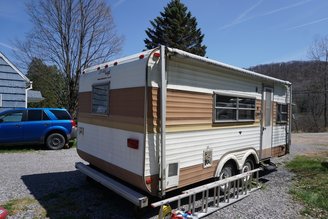
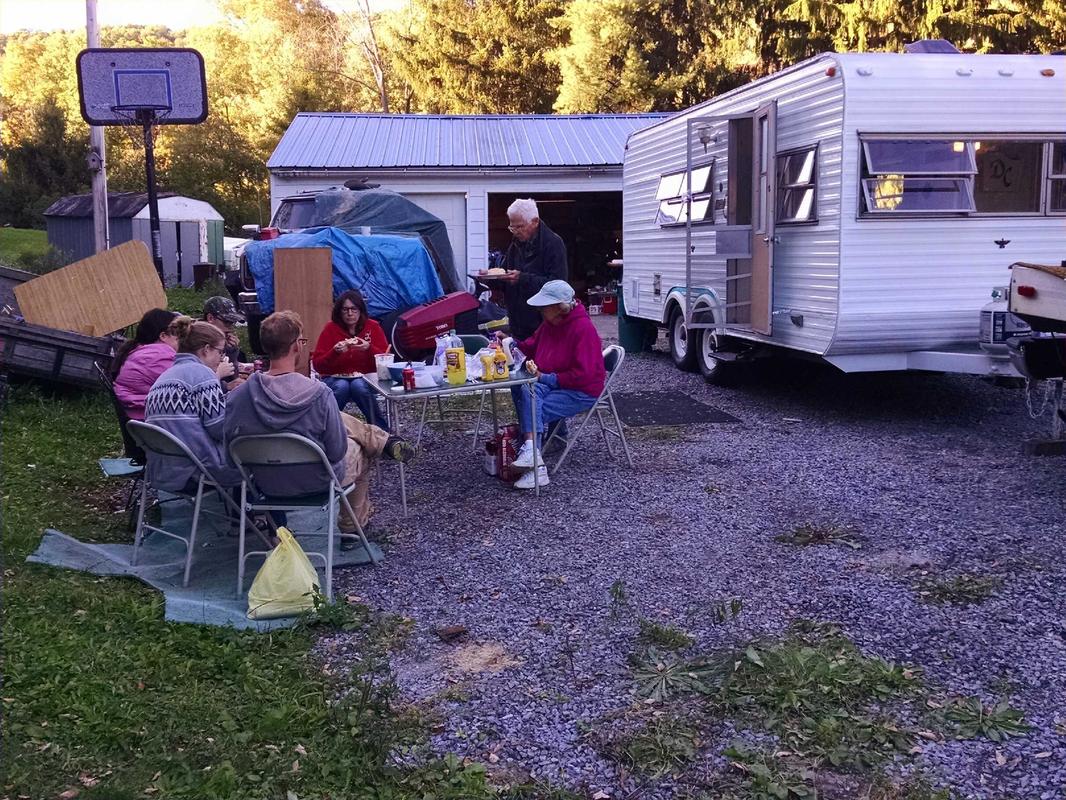
What exactly went wrong with the exterior paint is still a bit of a mystery. However, we learned some important tips that will make or break your DIY paint job. Cleaning, sanding, and priming are all very necessary and made it easier to cover the old brown and yellow. A wire brush on a cordless drill works wonders on years of sticky grime. When you are ready to paint, ABSOLUTELY thin with lacquer thinner. Supposedly, the type of paint we bought does not need to be thinned. False. After a long trial and error process and unclogging the spray gun one thousand times, we ended up having to thin the paint to almost 50/50. At that point, it was basically water and many coats were necessary. But, the trailer did finally get painted, and although it does resemble a sad perogie truck, it suits us.
The Final Step - PanicNeither of us fully remember the last three days before we left PA. I am unsure if we slept. I know we ate because Sam’s mom made us. If you set a date for when your new home on wheels absolutely has to be on the road, rest assured that the final days will be like the worst cramming for finals you have ever experienced. But, partially due to hysteria, we laughed a lot, accomplished something we truly did not feel capable of, and secretly had a lot of fun.
So, that’s how we brought our 1976 Dutchcraft back from the dead. It took a chunk of our money and all of our sanity, but we got it done. Honestly, our family and friends are the only reason that we were ever able to pull out of the driveway. Without them, I would still be crying into the green carpet and Sam would probably be missing a finger. We strongly recommended having a small army like ours assembled when taking on a project like this. You probably won’t be able to do it by yourself, and it’s way more fun that way. Thanks guys. We love you. 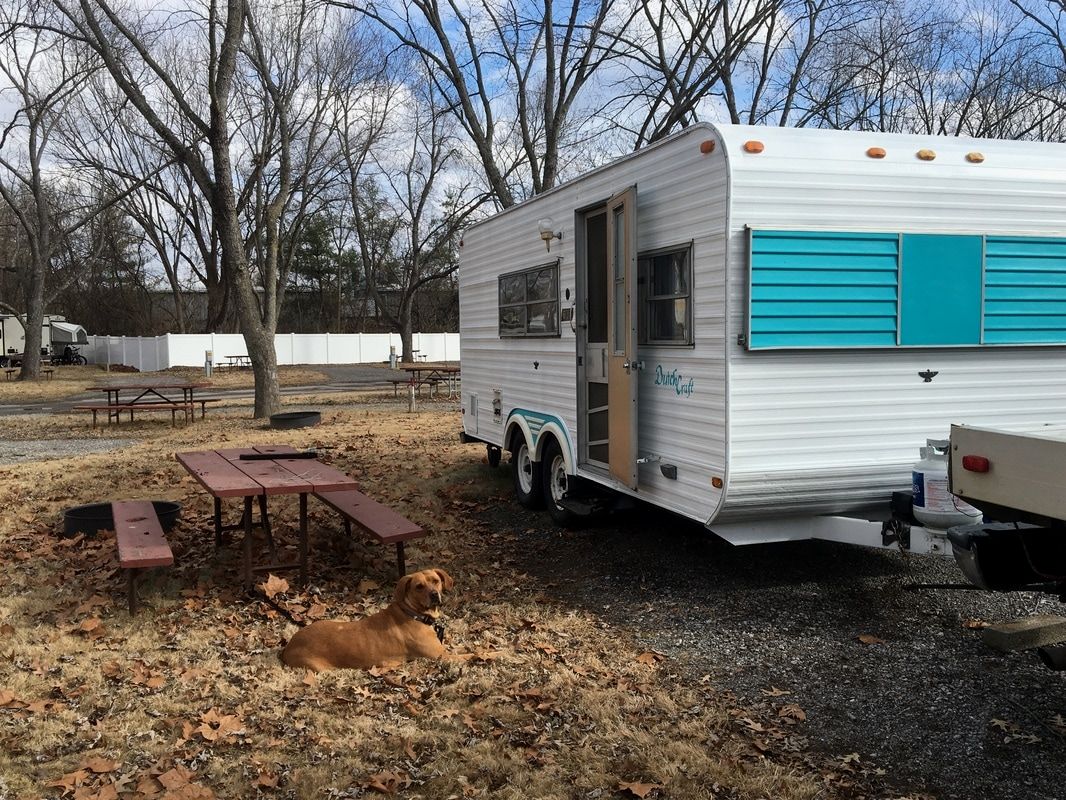
8 Comments
|

 RSS Feed